How to use your iMac as a monitor
Yes, you can use an iMac as a monitor for another Mac. Apple removed the feature that used to do this, Target Display Mode, after 2014, but with one cable and an app, a 27-inch iMac from 2017 or later becomes a full 5K display for your MacBook, Mac mini or Mac Studio.
This guide walks through the whole setup step by step, with screenshots from my own Macs, using DisplayBridge, the app I develop. It takes about five minutes.
In short: install DisplayBridge on both Macs, allow two permissions, connect the Macs with a Thunderbolt cable, click Connect, and arrange the screens in System Settings.
Can I use my iMac as a monitor?
That depends on the model. Click the Apple menu and choose About This Mac to see which iMac you have:
- 27-inch 5K iMac from 2017, 2019 or 2020, or an iMac Pro: yes. This guide is for you.
- 5K iMac from 2014 or 2015: not with DisplayBridge yet; support is coming soon. A hardware conversion kit works today.
- 21.5-inch iMac (2017, 2019) or 24-inch iMac with Apple silicon: should work, but hasn't been tested yet.
My guide Use an old iMac as a monitor goes through every model in detail. For iMacs from before 2014, see the Target Display Mode guide. This is what the result looks like:
What you need
- Two Macs on macOS 13 Ventura or later, both with Thunderbolt 3 or 4. On the iMac side, that means a 27-inch 5K iMac from 2017, 2019 or 2020, or an iMac Pro. On the other side, for example a MacBook with Apple silicon, a Mac mini or a Mac Studio (see which MacBooks work).
- One Thunderbolt cable or 40 Gbit/s USB-C cable (USB4). A normal USB-C charging cable looks the same but does not work. Look for the lightning symbol on the plug, or "40 Gb/s" on the packaging. Good ones start at about $10.
- DisplayBridge: a free 7-day trial with all features and no account, then $29 once for the Mac you work on. The iMac never needs a license.
- About five minutes.
If you prefer video, the six-minute setup video on YouTube shows exactly the same steps on my own iMac and MacBook.
Using your iMac as a monitor for a MacBook
A MacBook next to an iMac is the most common setup, and it is the one I use myself. I have tested DisplayBridge with a MacBook Air with M5 and a MacBook Pro with M1 Pro. Every MacBook with Apple silicon has Thunderbolt or USB4 ports and runs a current macOS, so I'm confident the others work the same way.
| MacBook | Works as the Mac you work on? |
|---|---|
| MacBook Air with M5 | Yes, tested |
| MacBook Pro with M1 Pro | Yes, tested (my own) |
| Every other MacBook Air and MacBook Pro with Apple silicon (M1 to M5) | Should work: same Thunderbolt or USB4 ports, current macOS |
| Intel MacBook Pro from 2017, Intel MacBook Air from 2018 | Meets the requirements (Thunderbolt 3, macOS 13 Ventura), not tested yet |
| 12-inch MacBook (2015 to 2017) | No: its USB-C port has no Thunderbolt |
On the iMac side, every 27-inch 5K iMac from 2017, 2019 or 2020 and the iMac Pro work. On the MacBook, you can use any of its Thunderbolt or USB-C ports for the cable; on the iMac, use one of the Thunderbolt ports on the back. Everything else is the same as in the steps below: the MacBook is the Mac you work on, so it needs the Screen Recording permission and the license, and the iMac is the display.
How to use your iMac as a monitor, step by step
Step 1: Install DisplayBridge on both Macs
Download DisplayBridge. The link starts the download right away; a file ending in .dmg lands in your Downloads folder. It is the same app for both Macs; there is no separate version for the iMac. Open that file and drag the DisplayBridge icon onto the Applications folder. Then open DisplayBridge from your Applications folder, not from the small installer window. The first time, macOS asks whether you really want to open an app downloaded from the internet; click Open. Do the same on the second Mac.
Step 2: Allow Local Network access
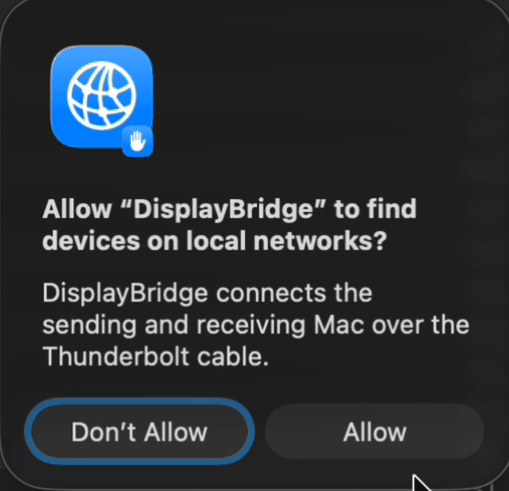
When DisplayBridge starts for the first time, macOS asks whether it may find devices on your local network. Click Allow. This is how the two Macs find each other over the cable; nothing is sent to the internet. On older macOS versions, the question may not appear at all, which is fine.
Step 3: Allow Screen Recording on the Mac you work on
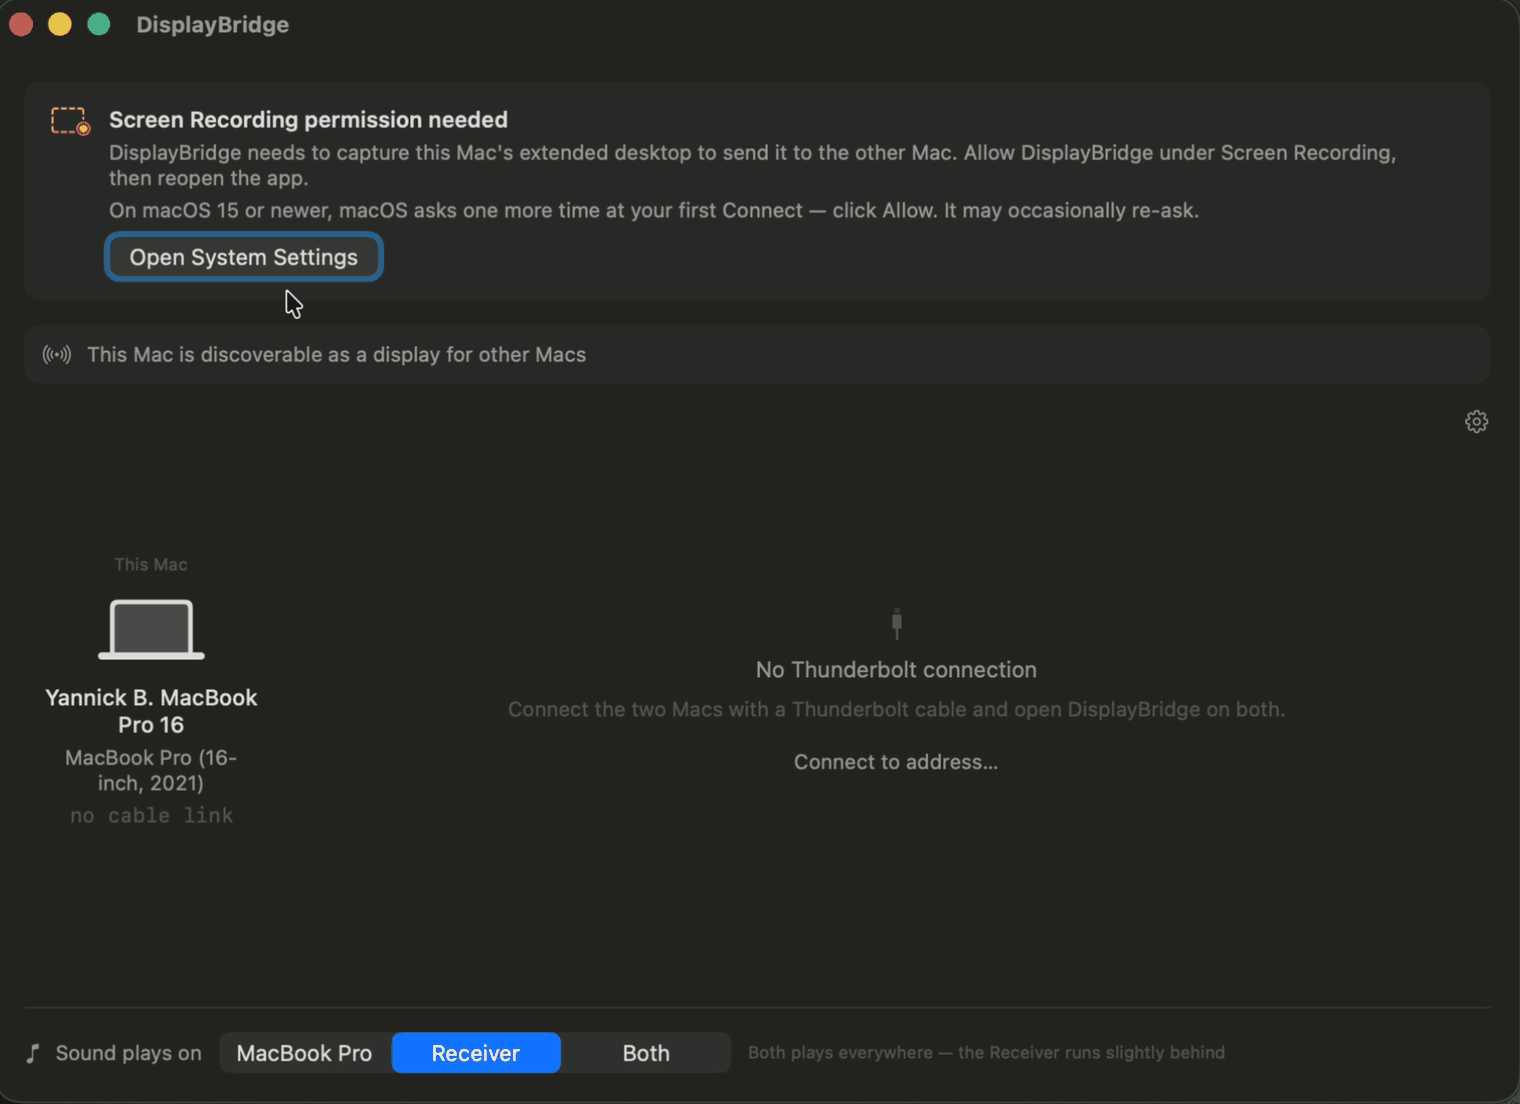
This permission is only needed on the Mac whose desktop you want to extend, for example your MacBook. The iMac doesn't need it. DisplayBridge shows a card with an Open System Settings button. Click it, switch DisplayBridge on under Screen & System Audio Recording, and click Quit & Reopen when macOS asks. macOS only applies the permission after the app has restarted, so don't skip that.
Step 4: Connect the two Macs with the cable
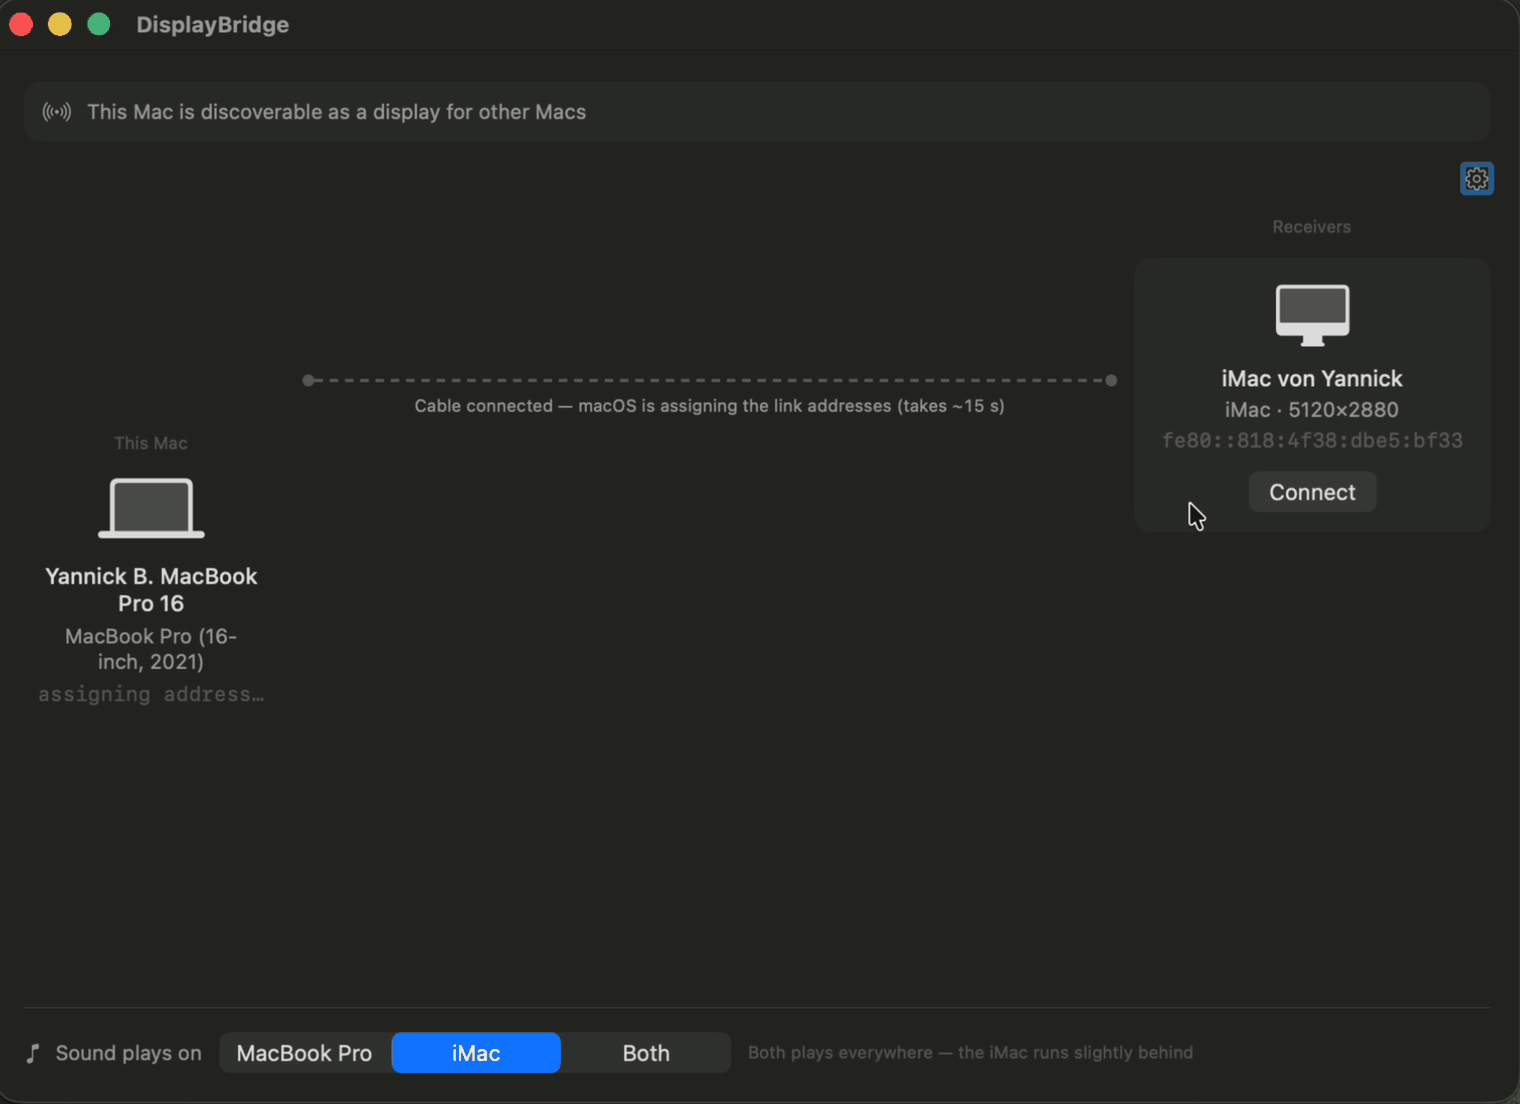
Plug the Thunderbolt cable into a USB-C port on your MacBook and into one of the Thunderbolt ports on the back of the iMac (marked with a small lightning symbol). You don't have to set up anything. Within a few seconds, the iMac appears in DisplayBridge's list of receivers. Right after plugging in, macOS needs up to about 15 seconds to set up the connection over the cable, and DisplayBridge shows you when that is happening.
Step 5: Click Connect
Click Connect next to the iMac's name. On macOS 15 or newer, the very first time, macOS asks once more whether DisplayBridge may access your screen and audio; click Allow. The iMac's screen goes dark for a moment and then shows your Mac's extended desktop.
Once connected, the line between the two Macs turns green and shows the connection: in my case Thunderbolt at 40 Gbit/s, 5120 × 2880 pixels at 60 frames per second, and 24 milliseconds from capturing a frame to showing it on the iMac.

Step 6: Arrange the displays
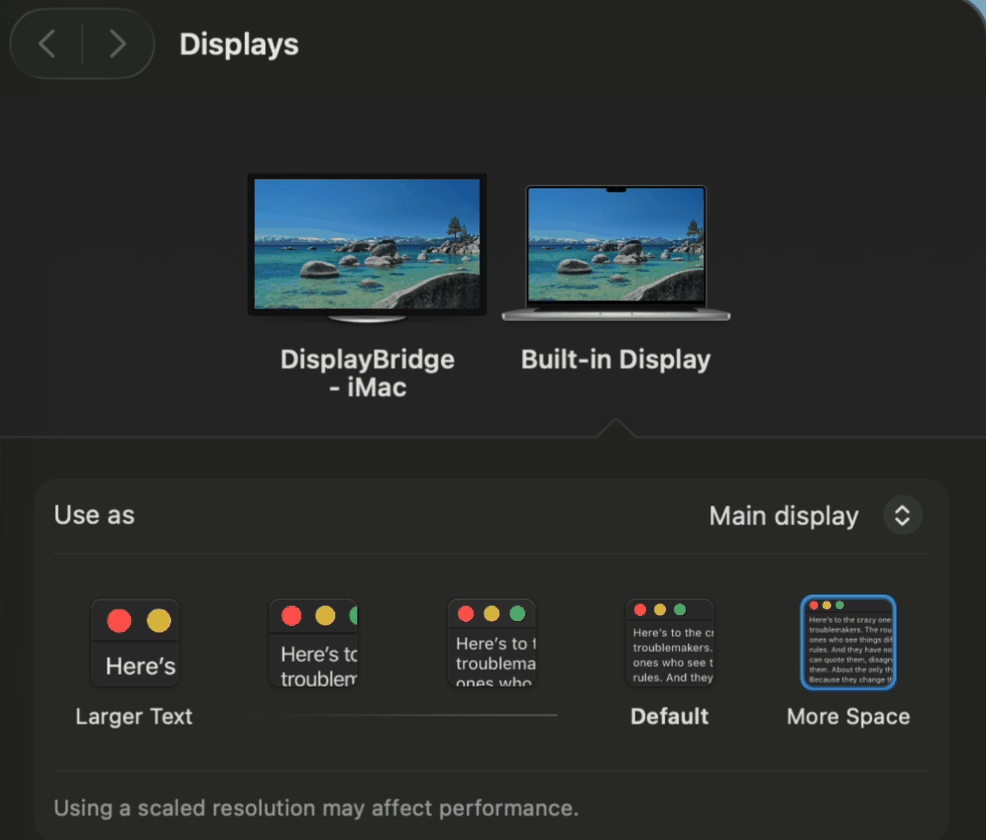
Open System Settings → Displays. The iMac appears there as "DisplayBridge - iMac", next to your Mac's built-in display, like any other monitor. Click Arrange… and drag the iMac to where it really stands on your desk: if it is to the left of your MacBook, drag it to the left. Now the mouse moves across exactly where you expect it. macOS remembers this, so you only do it once. Here you can also make the iMac your main display.
Everyday use
- Next time, you only plug in the cable and click Connect.
- Brightness and volume of the iMac are right in the DisplayBridge window, as sliders.
- Sound can play on the iMac, on your MacBook, or on both; you choose it at the bottom of the window.
- To stop, click Disconnect, or press the Escape key on the iMac's keyboard. The iMac is then a normal Mac again.
- The iMac has to be switched on and logged in, with DisplayBridge open, because it runs the receiving side.
The picture is sent uncompressed at the iMac's full resolution, and the delay is roughly 10 milliseconds longer than with a directly connected monitor, which is unnoticeable in everyday use.
If the iMac doesn't show up
- Check the cable. It has to be a Thunderbolt cable or a 40 Gbit/s USB-C cable. A USB-C charging cable is the most common reason nothing happens.
- Check that DisplayBridge is open on both Macs.
- Check that both Macs are awake. An iMac that nobody uses goes to sleep like any other Mac.
If it still doesn't work, the setup page has more help.
Other ways to use an iMac as a monitor
DisplayBridge isn't the only option. Here is how the alternatives compare for a 27-inch 5K iMac:
| Option | Which iMacs | Picture on a 5K iMac | Cost |
|---|---|---|---|
| DisplayBridge (this guide) | 27-inch 5K from 2017, iMac Pro | Full 5K at 60 Hz, uncompressed, with sound | $29 once |
| AirPlay to Mac | 2019 and newer, iMac Pro | Wireless and compressed; not the panel's native 5K | Free |
| Luna Display | Macs from 2011 on | Compressed; 5K at 45 Hz or 30 Hz | $89.99 adapter |
| Duet Display | Macs on macOS 10.14.4 or later | Up to 4K; needs an account | About $48 a year, or $139 lifetime |
| Conversion kit | 27-inch 5K, 2014 to 2020 | Full 5K at 60 Hz over DisplayPort or USB-C; the iMac stops being a computer | About $175–205 and 2+ hours of work |
Each of the linked guides compares that option with DisplayBridge in detail, including where it is the better choice. The comparison page lists all of them side by side.
Is it worth it?
A 27-inch 5K iMac has a better screen than most monitors you can buy, and it is already on your desk. With DisplayBridge it becomes a full 5K display for $29 and a cable, and it stays a working Mac you can use or sell later. If you don't own one yet, used 5K iMacs are often surprisingly cheap: I bought my 2017 5K iMac used for less than 200 Swiss francs. The easiest way to find out whether it works for you is to download the free 7-day trial.
Questions about this
How long does it take to set up an iMac as a monitor?
About five minutes the first time: installing the app on both Macs, allowing two permissions, plugging in the cable and clicking Connect. After that, you only plug in the cable and click Connect.
Do I need Target Display Mode to use my iMac as a monitor?
No. Target Display Mode only existed on iMacs up to mid-2014, and no 5K iMac ever had it. For a 27-inch iMac from 2017 or later, DisplayBridge does the same job over a Thunderbolt cable, at the full 5K resolution.
Does the iMac have to stay switched on?
Yes. The iMac has to be switched on and logged in, and DisplayBridge has to be open on it, because it runs the receiving side of the connection. An iMac that nobody has used for a while may have gone to sleep, so wake it before you click Connect.
How do I stop using the iMac as a monitor?
Click Disconnect in DisplayBridge, or press the Escape key on the iMac's keyboard. The iMac's own desktop comes back right away, and it works as a normal Mac again.
Why doesn't my iMac show up in DisplayBridge?
Check three things: that the cable is a Thunderbolt or 40 Gbit/s USB-C cable and not a charging cable, that DisplayBridge is open on both Macs, and that both Macs are awake. Right after plugging in the cable, macOS can take up to about 15 seconds to set up the connection.
Does this work with a Mac mini or Mac Studio instead of a MacBook?
Yes. Any Mac with Thunderbolt 3 or 4 on macOS 13 Ventura or later can use the iMac as its display, including a Mac mini from 2018 on and every Mac Studio. On a Mac mini or Mac Studio, use one of the Thunderbolt ports on the back.