AirPlay from Mac to Mac: how to use another Mac as a display
Yes, one Mac can AirPlay its screen to another Mac and use it as a second display. Apple calls this AirPlay to Mac. It arrived with macOS Monterey, it is built in, free and wireless. This guide shows how to set it up, which Macs can receive it, and where it falls short. Then I show the wired alternative, DisplayBridge, the app I develop, for when you want the other Mac to work like a real monitor.
In short: AirPlay to Mac is good for a presentation or a video on a bigger screen. For everyday work, its compressed picture and its delay get in the way. Over a Thunderbolt cable, DisplayBridge shows the full resolution uncompressed, between a Mac and an iMac or between two MacBooks.
What AirPlay to Mac is
Since macOS Monterey (12), a Mac can be an AirPlay receiver, the way an Apple TV is. Apple describes the feature as a way to “stream or mirror content to your Mac from an iPhone, iPad, or other Mac”. Between two Macs, that means the receiving Mac can mirror the other Mac's screen, show a single window or app, or act as an extended display: a second screen you can move windows to.
It needs no cable, no app and no money. Both Macs only have to be on the same Wi-Fi network, and the receiving Mac has to be one of the supported models.
Which Macs can receive AirPlay
Apple lists the Macs that can be an AirPlay display. All of them need macOS Monterey or later:
| Mac | Can it be the AirPlay display? |
|---|---|
| MacBook Pro and MacBook Air from 2018 | Yes |
| iMac from 2019, iMac Pro | Yes |
| Mac mini from 2020, Mac Studio, Mac Pro from 2019 | Yes, on their own monitor |
| 27-inch 5K iMac from 2017 and older iMacs | No |
| MacBooks from 2017 and older | No |
On the sending side, Apple says that older Macs and older macOS versions can also AirPlay to a supported Mac, but at lower video resolutions. For that, the receiving Mac has to allow AirPlay for "Everyone" or "Anyone on the Same Network". Apple also notes that AirPlay Receiver may be unavailable on a Mac that is managed by a company or school (MDM).
The gap that matters most is the 2017 iMac: it is the cheapest 5K iMac on the used market, and it can't receive AirPlay at all. To use it as a display for another Mac, you need a cable, as described below.
How to set up AirPlay from Mac to Mac
Step 1: Turn on AirPlay Receiver on the Mac that shows the picture
On the receiving Mac, open System Settings, click General in the sidebar, then AirDrop & Continuity (on macOS 13 to 15, the pane is called AirDrop & Handoff; on macOS 12, the setting is in System Preferences → Sharing). Turn on AirPlay Receiver.
Step 2: Choose who can AirPlay to it
Next to Allow AirPlay for, choose one of three options:
- Current User: only devices signed in to your Apple Account can see the Mac and AirPlay to it. Use this if both Macs are yours and use the same Apple Account.
- Anyone on the Same Network: any iPhone, iPad or Mac on your network.
- Everyone: any Apple device nearby.
You can also turn on Require password and set an AirPlay password, so that nobody else can put their screen on your Mac.
Step 3: Put both Macs on the same Wi-Fi network
Apple's requirement is simple: both Macs have Wi-Fi turned on and are connected to the same network.
Step 4: Choose the other Mac in Screen Mirroring
On the Mac you work on, click Control Center in the menu bar, then Screen Mirroring. Under Mirror or Extend to, choose the other Mac. iPads appear in the same list; choosing an iPad starts Sidecar instead.
Step 5: Choose Extended Display
macOS asks what you want to show on the other Mac: Window or App, Entire Screen (mirroring), or Extended Display, which uses the other Mac as an additional display. Choose Extended Display and click Extend Display. If a code appears on the other Mac, enter it. With Set as Default, macOS skips this question next time. The other Mac now appears in System Settings → Displays, where you can arrange it like any display.
Step 6: Stop when you are done
Open Screen Mirroring in Control Center again and click Stop Extending.
Where AirPlay to Mac falls short
For showing slides, a video or a single window on a bigger screen, AirPlay to Mac is hard to beat: it is free, wireless and already on your Mac. As a second monitor for everyday work, it has clear limits:
- The picture is compressed video. AirPlay sends your screen as a video stream over Wi-Fi, the same way it streams to an Apple TV. Fine text and thin lines lose some sharpness, so the receiving Mac doesn't show your desktop pixel-perfect.
- There is a delay. Apple doesn't publish a figure. For a video it doesn't matter, but when you move the mouse or type on the other screen, you notice it.
- It depends on the wireless connection. Both Macs have to be on the same network, and the picture can only be as steady as that connection.
- Older Macs send at a lower resolution, as Apple says itself, and the 2017 iMac and older iMacs can't receive at all.
The wired alternative: DisplayBridge
If you want the other Mac to work like a real monitor, a cable does better than Wi-Fi. DisplayBridge is the app I develop for exactly that. You install the same app on both Macs, connect them with a Thunderbolt cable or a 40 Gbit/s USB-C cable, and click Connect on the Mac you work on. The other Mac then appears in System Settings → Displays as a second display, like with AirPlay. The difference: the picture travels over the cable uncompressed, at the full resolution, with sound, and the delay is roughly 10 milliseconds longer than with a directly connected monitor, which is unnoticeable in everyday use.
A Mac and an iMac
With a 27-inch 5K iMac from 2017, 2019 or 2020, or an iMac Pro, you get the full 5120 × 2880 pixels at 60 Hz. That includes the 2017 iMac, which can't receive AirPlay at all. The iMac's speakers can play your Mac's sound over the same cable, and when you disconnect, the iMac is a normal Mac again.
Two MacBooks
A MacBook works the same way as the display. You get its full Retina resolution, and on a 14- or 16-inch MacBook Pro from 2021 on, the picture runs at 120 Hz, the same refresh rate as its own ProMotion screen. I use this with my two 16-inch MacBook Pros: one is the Mac I work on, the other becomes its second screen.
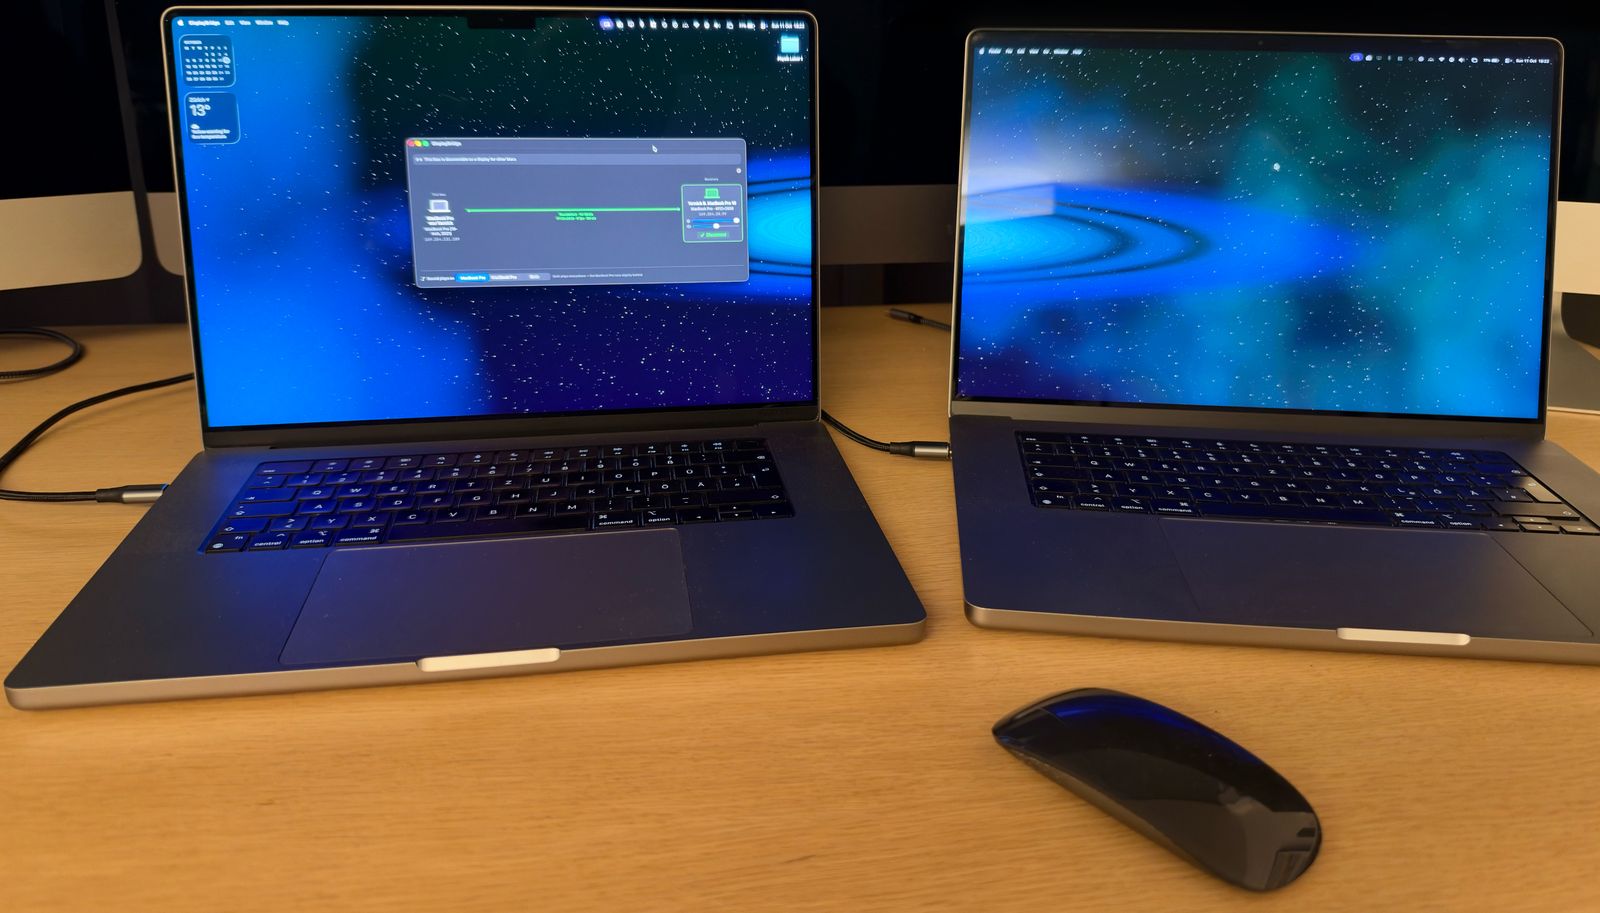
What you need, in both cases:
- Two Macs on macOS 13 Ventura or later, both with Thunderbolt 3 or 4. That includes every Mac with Apple silicon, the 5K iMacs from 2017 on and the iMac Pro, MacBook Pros from 2017 and MacBook Airs from 2018.
- A Thunderbolt cable or a 40 Gbit/s USB-C cable (USB4), from about $10. A normal USB-C charging cable looks the same but doesn't work.
- One license for the Mac you work on: $29, paid once, after a free 7-day trial. The Mac that shows the picture never needs a license.
My step-by-step guide shows the setup with screenshots, and the MacBook guide covers the two-MacBook setup in detail.
AirPlay to Mac vs. DisplayBridge
Green: the better option in that row · Red: the worse option · No color: no difference
| AirPlay to Mac | DisplayBridge | |
|---|---|---|
| Connection | Wireless, over Wi-Fi on the same network | One Thunderbolt or 40 Gbit/s USB-C cable |
| Picture | Compressed video | Uncompressed, at the full resolution |
| Delay | Noticeable when you work with the mouse; Apple publishes no figure | Roughly 10 ms longer than a directly connected monitor |
| Which Macs can be the display | MacBook Pro and Air from 2018, iMac from 2019, iMac Pro | Any Mac with Thunderbolt 3 or 4 on macOS 13, including the 2017 iMac |
| macOS | Monterey (12) or later | Ventura (13) or later on both Macs |
| Cost | Free, built into macOS | $29 once after a free 7-day trial; the display Mac never needs a license |
| Works with a Windows PC | No | No |
Which one to use: AirPlay to Mac if you need the bigger screen now and then, for a presentation or a video, and wireless matters more than sharpness. DisplayBridge if you want to work on the other Mac's screen every day, with a sharp picture and no noticeable delay, or if your display Mac is a 2017 iMac that can't receive AirPlay. The easiest way to compare is to try both: AirPlay is already on your Mac, and DisplayBridge has a free 7-day trial.
Questions about this
Can I AirPlay from one Mac to another?
Yes, since macOS Monterey. The receiving Mac has to be a supported model running macOS 12 or later, with AirPlay Receiver turned on in System Settings, and both Macs have to be on the same Wi-Fi network. On the sending Mac, you then choose the other Mac in Control Center under Screen Mirroring.
Which Macs can receive AirPlay?
According to Apple, Macs running macOS Monterey or later: MacBook Pro and MacBook Air from 2018, iMac from 2019, the iMac Pro, Mac mini from 2020, and the other Mac models from 2018 on. The 27-inch 5K iMac from 2017 and older iMacs can't be an AirPlay display.
Why doesn't my other Mac show up under Screen Mirroring?
Check four things on the receiving Mac: that AirPlay Receiver is turned on, that Allow AirPlay for isn't set to Current User while the two Macs use different Apple Accounts, that both Macs are on the same Wi-Fi network, and that the model is supported. Apple also notes that AirPlay Receiver may be unavailable on a Mac that is managed by a company or school (MDM).
Can I use AirPlay between two Macs over a cable?
Apple's documentation for AirPlay to Mac describes it over Wi-Fi, with both Macs on the same network. If you want a wired connection between two Macs, an app like DisplayBridge uses a Thunderbolt cable and sends the picture uncompressed at the full resolution.
Is AirPlay to Mac the same as Sidecar?
No. Sidecar uses an iPad as a second display for a Mac. AirPlay to Mac uses another Mac. In Control Center, both appear in the same Screen Mirroring list, which is why they are easy to mix up: choosing an iPad starts Sidecar, choosing a Mac starts AirPlay.
Does AirPlay to Mac cost anything?
No. It is built into macOS. DisplayBridge costs 29 dollars once after a free 7-day trial, and only the Mac you work on needs the license.